A No-nonsense Guide to Building Raised Beds From Scrap Timber: Real Resilience Without the Retail Markup

I was standing in my workshop last Tuesday, surrounded by a pile of weathered cedar offcuts and some old pallet slats, when I realized how much we overcomplicate the simplest acts of creation. Most folks think you need a massive budget and a trip to a high-end lumber yard to start a garden, but that’s a myth that keeps people from ever getting their hands dirty. In reality, building a raised bed from scrap timber isn’t just about saving a few pennies; it’s about breathing new life into something the world has cast aside. Just last season, I used some reclaimed oak to build a sanctuary for my heirloom tomatoes—I call them the ‘Napoleon Bonapartes’ of the patch because of their sheer, stubborn dominance over the other vines—and they’ve never thrived more.
As you start gathering your tools and clearing a patch of earth, I often find that the hardest part isn’t the physical labor, but simply finding the right inspiration to keep the momentum going when the sun starts to dip low. Whenever I feel a bit stuck or just need to see how others are breathing new life into their small spaces, I find myself wandering over to this platform to see what creative ideas are blooming in the community. It’s a wonderful way to fuel your creative spirit and remind yourself that every little project, no matter how small, is a vital step toward a more self-sufficient life.
In this guide, I’m going to strip away the fluff and show you exactly how to transform those forgotten scraps into sturdy, functional garden beds. We’ll walk through selecting the right wood, avoiding the nasty chemicals that can leach into your soil, and putting together a structure that will stand the test of time. No fancy power tools are required—just a bit of grit and a desire to cultivate something meaningful from the remnants of the old.
Guide Overview
Tools & Supplies
- Hammer or Drill for fastening the boards
- Handsaw or Circular saw for cutting timber to size
- Tape measure for accurate layout
- Level to ensure the ground is flat
- Scrap timber boards (various lengths)
- Screws or nails (weather-resistant)
- Hardware cloth or landscape fabric (optional for base)
Step-by-Step Instructions
- 1. Before we get our hands dirty, we need to gather our “building blocks.” Scour your shed or a local construction site for any leftover cedar, redwood, or even old fence posts—just make sure they haven’t been treated with heavy chemicals that might unsettle the soil. I like to think of this stage as scouting for potential new friends; after all, these planks are about to become the foundation for someone like Napoleon (my rather stubborn heirloom tomato plant) to thrive.
- 2. Once you’ve gathered your timber, it’s time for some much-needed measurement and cutting. Grab a tape measure and a saw, and decide on a scale that won’t overwhelm your back; I usually aim for a width of about three feet so I can reach the center without stepping on the precious earth. Try to keep your cuts straight and true, as even a slightly crooked board can make the whole structure feel a bit wonky once it’s standing.
- 3. Now, let’s prepare the perimeter by prepping your corner posts. You’ll want some sturdy, square pieces of wood to act as the anchors for your corners. I find that using slightly longer posts—the kind that can sink a few inches into the ground—provides a sturdy backbone that prevents the bed from bowing outward as your plants grow heavy and lush.
- 4. It’s time to bring the structure to life by assembling the walls. Lay your side planks against the corner posts and start driving in some galvanized or stainless steel screws. I always recommend pre-drilling your holes first; it’s a small bit of extra work that prevents the wood from splitting, which is a heartbreak no gardener wants to endure when they’re just trying to build a sanctuary.
- 5. With the frame standing tall, we need to ensure it’s level and secure. Place your new bed in its permanent home and check it with a level tool; if one side is higher than the other, dig out a little soil underneath to compensate. Once it’s sitting flat, you can drive those corner posts deeper into the earth to ensure your garden’s new home stays steadfast through the seasons.
- 6. Before we add the soil, let’s give the interior a little extra love by lining the bottom. If you’re using older wood, laying down a layer of untreated burlap or even some thick, recycled cardboard can act as a wonderful natural barrier. This helps suppress weeds while slowly breaking down, adding a tiny bit of organic goodness back into the ground as the years pass.
Upcycling Old Pallets for Gardening a Second Life
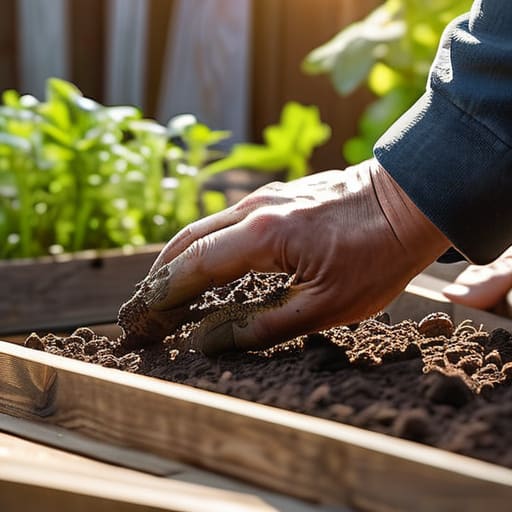
Now, if you find yourself with a surplus of wooden pallets leaning against a shed wall, don’t just see them as clutter; see them as potential treasure. Upcycling old pallets for gardening is one of my favorite ways to breathe life into something forgotten. However, I always tell my readers to be a bit like a detective here. You really need to check those stamps on the side of the wood. You’re looking for “HT” (Heat Treated), which is the gold standard for safe wood for vegetable gardening. Avoid anything marked “MB,” as that stands for Methyl Bromide, a nasty pesticide that we definitely don’t want leaching into the soil where our leafy greens are growing.
Once you’ve verified your materials are clean, you can start dreaming up your designs. While I often lean toward classic repurposed wood garden beds, pallets offer a wonderful opportunity to build vertical herb towers or even tiered planters. It’s all about seeing the potential in the weathered grain. Just remember, even with reclaimed finds, a little bit of treating scrap lumber for outdoor use with a natural, food-safe linseed oil can go a long way in ensuring your new garden sanctuary stands the test of time against the elements.
Choosing Safe Wood for Vegetable Gardening Success
Now, before we start hammering away, we need to have a little heart-to-heart about what we’re actually putting into the soil. While I love the idea of breathing new life into forgotten materials, we have to be mindful of what might be hiding in those fibers. When you’re hunting for safe wood for vegetable gardening, you want to steer clear of anything treated with older, heavy-duty chemicals like CCA (chromated copper arsenate). I remember my grandfather once telling me that the earth has a long memory; we don’t want to feed our tomatoes anything that wasn’t meant for them.
If you find yourself working with older scraps, look for stamps that indicate the wood is untreated or heat-treated rather than chemically preserved. If you’re unsure, a good rule of thumb is to stick to naturally rot-resistant species like cedar or larch. If you do find yourself treating scrap lumber for outdoor use, please ensure you’re using food-safe, organic oils or non-toxic sealants. We want our garden beds to be a sanctuary for our plants—and for my dear friend Napoleon, my particularly stubborn zucchini—not a chemistry experiment!
Little Wisdoms for a Long-Lasting Sanctuary
- Give your timber a gentle sanding before the soil moves in; it saves your hands from splinters and ensures your little seedlings don’t get snagged on rough edges as they stretch toward the sun.
- Don’t forget to line the bottom with a thick layer of untreated cardboard; it’s a wonderful way to suppress weeds while slowly decomposing, feeding the earth just like a nutritious snack for my dear friend, Napoleon (my most ambitious zucchini plant).
- If you’re using older, weathered scraps, consider applying a natural linseed oil finish; it adds a bit of protective magic against the rain without introducing any harsh chemicals into your growing medium.
- Mind the structural integrity by adding a sturdy corner post; even the most beautiful scrap wood needs a strong backbone to hold up the weight of damp, heavy soil during those spring deluges.
- Space your boards with a bit of breathing room or use small wooden spacers; it helps with drainage and prevents the wood from warping too quickly, ensuring your garden beds remain sturdy companions for many seasons to come.
Sowing the Seeds of a New Beginning
As we pull the final nails and clear away the sawdust, take a moment to look at what you’ve achieved. We’ve journeyed from scouting for the right, non-toxic timber to the hands-on joy of assembling a sturdy structure from what others might have called junk. By carefully selecting safe wood and breathing new life into those old pallets, you haven’t just built a garden bed; you have engineered a small ecosystem right in your backyard. Remember, the secret to a thriving garden isn’t just the soil or the sunlight, but the intentionality behind every piece of wood you choose to place in the earth.
I often think about my dear friend Napoleon, my particularly stubborn heirloom tomato plant, and how much he appreciates the solid foundation you’ve just provided for him. Building something with your own two hands creates a profound connection to the land that no store-bought plastic container could ever replicate. As you tuck your first seeds into this reclaimed sanctuary, know that you are doing more than just gardening; you are cultivating resilience and honoring the cycle of renewal. So, grab your trowel, step into the sunlight, and let’s watch as these small acts of upcycling blossom into a bountiful, sustainable future.