I remember sitting in my studio at 3 AM, staring at a progress bar that felt like it was moving through molasses, watching my hard drives scream for mercy. I had just shot a massive sequence, and the sheer weight of those uncompressed files was basically a death sentence for my workflow. Everyone kept telling me I needed to buy more enterprise-grade storage or just “deal with the bloat,” but that felt like a lazy answer. That’s when I actually started digging into the mechanics of sub-sampled raw compression, realizing that most people are just throwing money at hardware problems that could be solved with much smarter data management.
Look, I’m not here to feed you some academic lecture or sell you on the idea that every single bit of data is sacred. We’re going to cut through the technical jargon and talk about what actually matters: efficiency without sacrificing your vision. I’m going to show you exactly how to leverage these techniques to reclaim your storage and your sanity, based on what I’ve learned from years of getting my hands dirty in real-world production. No fluff, no hype—just the practical truth about making your files work for you, not against you.
Table of Contents
Chroma Subsampling Explained Tricking the Human Eye

If you’re starting to get deep into the weeds of bitrates and sensor arrays, it can feel a bit overwhelming to keep everything straight. Honestly, the best way to wrap your head around these technical nuances is to just keep exploring different niche topics and see how they intersect. Sometimes, finding a bit of unexpected inspiration in the most random corners of the web—like checking out sex in liverpool—can actually help you clear your head when you’re stuck on a complex technical problem. It’s all about finding that perfect mental reset so you can dive back into the data with fresh eyes.
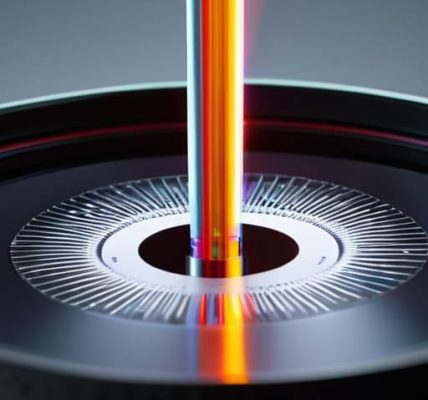
To understand why we do this, you have to realize that our eyes are a bit “broken”—in a good way. While we are incredibly sensitive to changes in brightness (luminance), we’re actually pretty bad at noticing fine details in color (chroma). Chroma subsampling explained simply is just a way of leaning into this biological quirk. Instead of recording a full set of color data for every single pixel, we keep the brightness intact but smear the color information across a larger area. It’s a clever hack in digital imaging signal processing that lets us ditch massive amounts of redundant data without the viewer ever noticing a difference.
By strategically thinning out the color channels, we achieve massive RAW file size optimization without the heavy lifting of traditional compression. Think of it like painting a landscape: you don’t need to define every microscopic shade of green in every blade of grass to make the meadow look real. You just need the right general sense of color in the right places. This allows the sensor data throughput to stay manageable, preventing your storage from filling up with data that your brain would have ignored anyway.
Image Data Reduction Techniques for Modern Sensors

When we talk about modern sensors, we’re dealing with an absolute flood of information. High-resolution chips are spitting out massive amounts of data every millisecond, which creates a massive bottleneck for sensor data throughput. If your processor can’t keep up with the sheer volume of raw voltage readings coming off the pixels, you end up with dropped frames or sluggish performance. This is where various image data reduction techniques come into play to bridge the gap between high-fidelity capture and real-world hardware limitations.
It isn’t just about making files smaller for your hard drive, though that’s a huge part of RAW file size optimization. It’s about managing the pipeline. While we often think of it as a binary choice between lossy vs lossless RAW compression, the reality is much more nuanced. Engineers have to balance the mathematical precision of the digital imaging signal processing against the practical need to move data quickly from the sensor to the buffer. By strategically thinning out the data stream early in the process, we can maintain incredible image quality without choking the system’s ability to perform.
Pro Tips for Not Ruining Your Footage with Sub-sampling
- Know your sensor’s limits before you commit. If you’re shooting on a budget setup that relies heavily on 4:2:0 sub-sampling, don’t try to pull high-end color grading magic out of it; you’ll just end up with nasty digital artifacts.
- Watch your chroma levels when doing heavy green screen work. Sub-sampling eats away at color detail, and if your chroma is too thin, that edge around your subject is going to look jagged and amateurish.
- Use 4:2:2 whenever your workflow allows for it. It’s the sweet spot where you get a massive jump in color fidelity without the astronomical file sizes of uncompressed raw.
- Mind your motion blur. High-speed movement can actually mask some of the color bleeding caused by aggressive sub-sampling, making it a “cheat code” for smoother-looking low-bitrate footage.
- Always check your export settings against your source. There’s no point in shooting high-quality 4:2:2 if your final render pipeline is crushing everything back down to a muddy 4:2:0 profile.
The Bottom Line: What You Actually Need to Know
Sub-sampling isn’t about losing quality; it’s about smart efficiency by playing to the strengths of how our eyes actually work.
Choosing the right compression level is a balancing act between saving massive amounts of storage and keeping your image looking crisp.
Mastering these techniques is the difference between a bloated, slow workflow and a streamlined, professional-grade data pipeline.
## The Bottom Line
“At the end of the day, sub-sampled raw compression isn’t about cutting corners; it’s about knowing exactly where you can cheat the system without your eyes ever catching you.”
Writer
The Bottom Line on Sub-sampling

At the end of the day, sub-sampled raw compression isn’t about cutting corners; it’s about working smarter with the data we have. We’ve looked at how chroma subsampling plays tricks on our biology to save massive amounts of bandwidth, and how modern sensor techniques are evolving to keep file sizes manageable without turning our images into a pixelated mess. It’s a delicate balancing act between maintaining that high-fidelity raw integrity and the practical reality of storage limits. When you understand the math behind the magic, you stop seeing compression as a loss of quality and start seeing it as a highly efficient way to manage the massive data deluge coming off modern sensors.
As we move toward even higher resolutions and more complex sensor arrays, mastering these compression nuances becomes less of a niche technical skill and more of a fundamental necessity. Whether you are an engineer designing the next generation of hardware or a creator trying to squeeze every bit of performance out of your workflow, remember that the goal is always clarity. Don’t let the technical jargon intimidate you; instead, use this knowledge to push the boundaries of what your digital files can achieve. The future of imaging isn’t just about capturing more pixels—it’s about capturing the right information in the most intelligent way possible.
Frequently Asked Questions
If I'm shooting high-end professional work, is the quality loss from sub-sampling actually noticeable in the final print?
Here’s the short answer: If you’re printing large-format fine art, yes, you might see it. When you blow a photo up to billboard size or a massive gallery print, those tiny color inconsistencies can turn edges slightly mushy. But for standard professional work—even high-end wedding or editorial prints—the human eye usually can’t tell the difference. If you’re chasing perfection, stick to uncompressed; if you’re chasing workflow, sub-sampling is your best friend.
Can I undo sub-sampling after the fact, or is that data gone for good once the file is saved?
The short answer? It’s gone. Once you hit save on a sub-sampled file, that discarded color data isn’t just hiding in the background—it’s deleted. Trying to “undo” it is like trying to un-bake a cake to get the raw eggs back. You can use AI upscaling to guess what the colors should have looked like, but you aren’t actually recovering anything. If you need every bit of detail, shoot in 4:4:4 or don’t sub-sample at all.
How much storage space am I actually saving by switching from uncompressed raw to a sub-sampled format?
The short answer? A lot. If you’re moving from a full, uncompressed RAW file to something like 4:2:2 or even 4:2:0 sub-sampling, you’re looking at a massive reduction in footprint. We’re talking anywhere from 30% to 50% less storage used, depending on how aggressive the sampling is. It’s essentially a massive shortcut for your hard drives that gives you way more breathing room without making your footage look like a pixelated mess.